

1. Introduction
Angular is a powerful and popular front-end JavaScript framework that allows developers to build dynamic and interactive web applications. If you’re new to Angular and looking for a step-by-step tutorial on how to build your first Angular application, you’ve come to the right place. In this beginner’s guide, we will walk you through the process of building a single-page application (SPA) using Angular, providing you with easy-to-follow steps and clear explanations along the way. Whether you are a seasoned web developer or just starting, this tutorial will equip you with the knowledge and skills to kick-start your Angular journey.
2. Understanding Angular and its benefits for beginners
When starting with Angular, it is important to have a clear understanding of what it is and its benefits. Angular is a powerful front-end JavaScript framework developed and maintained by Google. It allows developers to create dynamic, robust, and scalable web applications.
One of the key benefits of using Angular is its declarative coding style. With Angular, you can define the behaviour of your application using simple and intuitive HTML templates. This makes it easier to understand and maintain your codebase, especially for beginners.
Another advantage of Angular is its modular architecture. Angular applications are built using reusable components, making it easier to manage and update different parts of your application independently. This modular approach also promotes code reusability and maintainability, saving developers time and effort.
Furthermore, Angular provides a comprehensive set of tools and features that streamline the development process. From dependency injection to data binding and routing, Angular offers a wide range of features that help developers build robust and efficient applications.
Now that we have a good understanding of Angular and its benefits, let’s move on to the next step: setting up our development environment.
3. Setting up your development environment
Setting up your development environment is a crucial step in building your first Angular application. It ensures that you have all the necessary tools and dependencies installed, allowing you to start coding without any hurdles.
To begin, you’ll need to have Node.js installed on your machine. Node.js is a JavaScript runtime that allows you to run JavaScript code outside of the browser. It also includes npm (Node Package Manager), which is used for installing and managing packages in your application.
Once you have Node.js installed, you can use npm to install the Angular CLI (Command Line Interface). The Angular CLI is a command-line tool that helps you scaffold and manage your Angular applications. It provides a set of powerful commands that make it easier to generate components, services, and other Angular features.
To install the Angular CLI, open your command prompt or terminal and enter the following command:
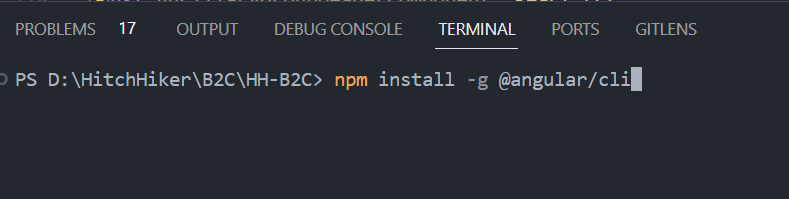
This will install the Angular CLI globally on your machine.
Once the installation is complete, you can verify that the Angular CLI was installed successfully by running the following command:

This will display the installed version of the Angular CLI along with other relevant details.
Congratulations! You now have your development environment set up and ready to go. In the next section, we will explore the basic structure of an Angular application and start building our first component.
4. Creating your first Angular project
Now that we have our development environment set up, it’s time to create our first Angular project. To do this, we will use the Angular CLI that we installed in the previous section.
Open your command prompt or terminal and navigate to the directory where you want to create your project. Once you are in the desired directory, enter the following command:

This will generate a new Angular project with the name “my-first-angular-app” in the current directory. The Angular CLI will automatically create all the necessary files and folders for your project.
After the project is created, navigate into the project directory by entering the following command:

Now, we are ready to run our project. Enter the following command to start the development server:

This will start the development server and compile your Angular application.
You can then open your browser and navigate to `http://localhost:4200` to see your application running.
In the next section, we will dive deeper into the structure of an Angular project and explore how components work. Stay tuned!
5. Understanding components and how to build them
In the previous section, we successfully created our first Angular project using the Angular CLI. Now it’s time to dive deeper into the structure of an Angular project and explore how components work.
Components are the building blocks of Angular applications. They are responsible for displaying and controlling the view layer. In simple terms, a component is like a custom HTML element that can contain HTML, CSS, and even JavaScript code.
To create a component, we will use the Angular CLI. Open your command prompt or terminal and navigate to the project directory. Then, enter the following command:

This will generate a new component with the name “my-component”. The Angular CLI will automatically create all the necessary files and update the project’s configuration.
Once the component is generated, you can find it under the “src/app” directory. Open the generated files and explore how they are structured.
That’s it for this section! In the next section, we will learn how to use components in our Angular application and build a basic user interface. Stay tuned for more!
6. Working with services and data bindings
In the next section, we will delve into working with services and data bindings in our Angular application. Services are a way to effectively share data and functionality across multiple components. They act as a bridge between components and provide a centralized place to manage data and perform tasks.
To create a service, we can again utilize the Angular CLI. Open your terminal or command prompt, navigate to your project directory, and enter the following command:

This will generate a new service with the name “data”. The Angular CLI will automatically create all the necessary files and update the project’s configuration.
Once the service is generated, you can find it under the “src/app” directory. Open the generated files and explore how they are structured.
Data binding is a powerful feature in Angular that allows us to effortlessly synchronize data between our components and the user interface. We can bind data to our HTML templates using different binding expressions.
In the next section, we will explore these concepts further and demonstrate how to create a simple data-driven application using services and data bindings. Stay tuned for more insightful tips and tricks on building your first Angular application!
7. Implementing routing and navigation in your application
In this section, we will cover how to implement routing and navigation in your Angular application. Routing allows you to create multiple views or pages in your application and navigate between them seamlessly.
To get started with routing, we need to first configure our routes. Open the “app-routing.module.ts” file in the “src/app” directory. Here, you will see a pre-configured route for the default component.
To add additional routes, you can simply import the components you want to navigate to and define a new route within the “Routes” array. Each route consists of a path and the corresponding component it should render.
Once the routes are configured, we need to add a “router-outlet” tag in our main component’s template. This will serve as the placeholder for displaying the different views based on the current route.
To navigate between routes, we can utilize the Angular Router’s “routerLink” directive. This directive allows us to create clickable links that will automatically navigate to the specified route. For example, you can add the following code to your template:
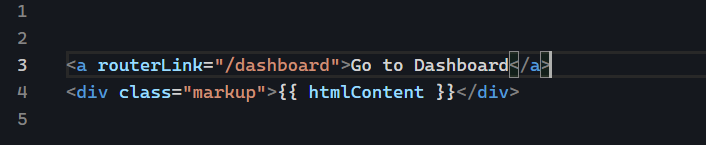
In the next section, we will explore how to add navigation menus, route parameters, and guards to enhance the functionality of our application. Stay tuned for more exciting developments as we continue building your first Angular application!
8. Enhancing your application with Angular Material
In the next section, we will explore how to enhance the user interface of your Angular application by integrating Angular Material. Angular Material is a UI component library that provides pre-built and customizable UI components for Angular applications.
To get started, you need to install Angular Material by running the command:

Once installed, you can import the necessary Angular Material components in your module file and start using them in your templates. For example, you can add a Material toolbar, buttons, cards, and forms to enhance the visual appeal and functionality of your application.
Angular Material also provides theming and styling options to customize the look and feel of your application. You can easily change the colour scheme, typography, and other design aspects to match your branding or personal preferences.
In the upcoming section, we will dive deeper into Angular Material and explore how to use some of its most commonly used components. So stay tuned as we continue to build your first Angular application with ease and style!
9. Testing and debugging your Angular application
Testing and debugging are crucial steps in building a high-quality Angular application. In this section, we will learn how to effectively test and debug your code to ensure it is functioning as expected.
When it comes to testing, Angular provides a powerful testing framework called Jasmine. Jasmine allows you to write unit tests for your components, services, and other Angular entities. These tests help identify any issues in your code and ensure that it behaves correctly in different scenarios.
To start writing tests, you need to create spec files for each component or service. These spec files contain a set of test cases that verify the expected behaviour of your code. You can use various testing functions and matches provided by Jasmine to perform assertions and check for expected outcomes.
In addition to unit tests, Angular also supports integration and end-to-end (e2e) testing using tools like Protractor. Integration tests help verify the interactions between different components, while e2e tests simulate real user scenarios to test the entire application flow.
When it comes to debugging, Angular provides excellent tools to help you identify and fix issues in your code. The Angular Developer Tools, available as a browser extension, allow you to inspect and debug your application in real-time. You can set breakpoints, step through your code, and analyse the state of your application to identify any bugs or logical errors.
In the next section, we will dive deeper into testing and debugging techniques and explore best practices to ensure the reliability and stability of your Angular application. So stay tuned and let’s make sure your application is error-free and ready for deployment!
10. Deploying your Angular application to a web server
After successfully testing and debugging your Angular application, it is time to deploy it to a web server and make it accessible to users. Deploying an Angular application involves a few key steps that ensure your application runs smoothly in a production environment.
First, you need to build your application using the Angular CLI. The CLI provides a command to generate a production-ready build of your application that is optimized for performance. This build process bundles and minifies your code, making it smaller and faster to load.
Once you have the production build, you can deploy it to a web server of your choice. There are various options available, such as hosting providers, cloud platforms, or your server. It is important to choose a reliable and scalable hosting solution that fits your needs.
Before deploying, you should also consider optimizing your application for search engines by implementing search engine optimization (SEO) techniques. These techniques involve optimizing your application’s metadata, using proper URLs, and ensuring your content is easily discoverable by search engines.
Once your application is deployed, it is crucial to monitor its performance and address any issues that may arise. Tools like Google Analytics can help you track user interactions, identify issues, and make data-driven decisions to improve your application.
In the upcoming section, we will explore the deployment process in detail and discuss best practices to ensure a seamless deployment experience. So, stay tuned and get ready to launch your Angular application for the world to see.
11. Deploying and Launching Your Angular Application
Now that you have successfully built your Angular application and optimized it for performance, it is time to deploy and launch it for the world to see. Deploying your Angular application involves a few essential steps that will ensure your application runs smoothly in a production environment.
The first step is to choose a reliable and scalable hosting solution that fits your needs. You can opt for popular hosting providers, cloud platforms, or even set up your server. Consider factors such as cost, scalability, and support when making your decision.
Once you have chosen your hosting solution, you need to deploy your production build to the web server. Transfer your application files to the server and configure any necessary settings. Make sure to follow any specific instructions provided by your hosting provider.
Before launching your application, it is crucial to test it thoroughly in the production environment. Ensure that all features and functionalities are working as expected and that the application loads quickly. Additionally, perform cross-browser testing to ensure compatibility across different browsers.
At this stage, it is important to think about search engine optimization (SEO) techniques to make your application easily discoverable by search engines. Implementing SEO techniques such as proper metadata, optimized URLs, and high-quality content can improve your application’s visibility in search engine results.
Once your Angular application is deployed and optimized, it is crucial to continuously monitor its performance and address any issues that may arise. Use tools like Google Analytics to track user interactions, identify bottlenecks, and make data-driven decisions to improve your application’s performance.
In conclusion, deploying and launching your Angular application requires careful consideration of hosting options, thorough testing, and implementation of SEO techniques. By following these steps and continuously monitoring your application’s performance, you can ensure a seamless and successful launch of your first Angular application.
In the next section, we will explore additional tips and best practices for maintaining and scaling your Angular application. So, stay tuned for more valuable insights to further enhance your development skills.
12. Conclusion:
Building your first Angular application can be a rewarding experience for beginners. Take your time, follow the step-by-step guide, and enjoy the process of becoming an Angular developer.